This is post is originally published on crypt.codemancers.com.
AWS CodeDeploy is part of Amazon deployment services which can be used to deploy your application across EC2 instances. This post will walk you through how to setup aws codedeploy for you application on github.
Create AWS IAM roles
The first step towards setting up codedeploy is to setup two IAM roles. One for codedeploy to talk to EC2 instances and other for EC2 instance to access s3.
A IAM role is a set of permission policies that can be used to grant access to various AWS resources by associating with either by an IAM user in same account or different.
Let’s create the first role for codedeploy
- Go to IAM -> roles -> create new Role
- Give a name for the role “code-deploy” and Goto Next Step
- In Role Type -> select ->
Amazon EC2below AWS service Roles - In Attach Policy select ->
AWSCodeDeployRole - Create Role
- Edit the
Trust relationshipand update the content to the following one
{
  "Version": "2012-10-17",
  "Statement": [
    {
      "Sid": "",
      "Effect": "Allow",
      "Principal": {
        "Service": "codedeploy.amazonaws.com"
      },
      "Action": "sts:AssumeRole"
    }
  ]
}
Now we can create the second role to give EC2 instance to access s3.
- Go to IAM -> roles -> create new Role
- Give a name for the role “CodeDeploy-EC2” and Goto Next Step
- In Role Type -> select ->
Amazon EC2below AWS service Roles - In Attach Policy select ->
AmazonS3ReadOnlyAccess - Create Role
Create AWS instance
Next step is to Goto EC2 Instances and launch a new instance.
While creating an instance you can choose any instance type but make sure to choose
CodeDeploy-EC2 as IAM role in Configure instance.
In Add tags section add a tag with Name as key and Value as codedeploy-demo (You can name the instance as per your need)
Install code deploy
Once the instance is booted up we can install the code deploy agent that instance.
Since I used ubuntu AMI to create the EC2 instance, we can install the codedeploy agent using apt-get.
sudo apt-get install python-pip ruby wget
cd /home/ubuntu
Now you need to download the agent as per the region of you instance. Here is the list of all regions.
Since we booted the EC2 instance in Asia Pacific (Mumbai) region we can use the below commands to download and install the codedeploy agent.
wget https://aws-codedeploy-ap-south-1.s3.amazonaws.com/latest/install
chmod +x ./install
sudo ./install auto
Once it is installed you can verify whether the codedeploy agent is running or not by using the command
sudo service codedeploy-agent status
If the service is inactive, you can start the service using the command:
sudo service codedeploy-agent start
Prepare the application
Next is to add the appspec.yml file to the application, appspec.yml file will have information
on what to install on to instances and what lifecycle events to run.
The format for appspec.yml file is
version: 0.0
os: linux
files:
  - source: /index.html
    destination: /var/www/html/
hooks:
  BeforeInstall:
    - location: deploy/before_install
      timeout: 300
      runas: ubuntu
  AfterInstall:
    - location: deploy/restart_server
      timeout: 300
      runas: ubuntu
The beforeInstall hook will will be
# deploy/before_install
#!/bin/bash
sudo rm -f /var/www/html/index.html
and AfterInstall hook
# deploy/after_install
#!/bin/bash
sudo service apache2 restart
You can find more detailed options for appspec.yml on AWS CodeDeploy AppSpec File Reference
Setup AWS CodeDeploy
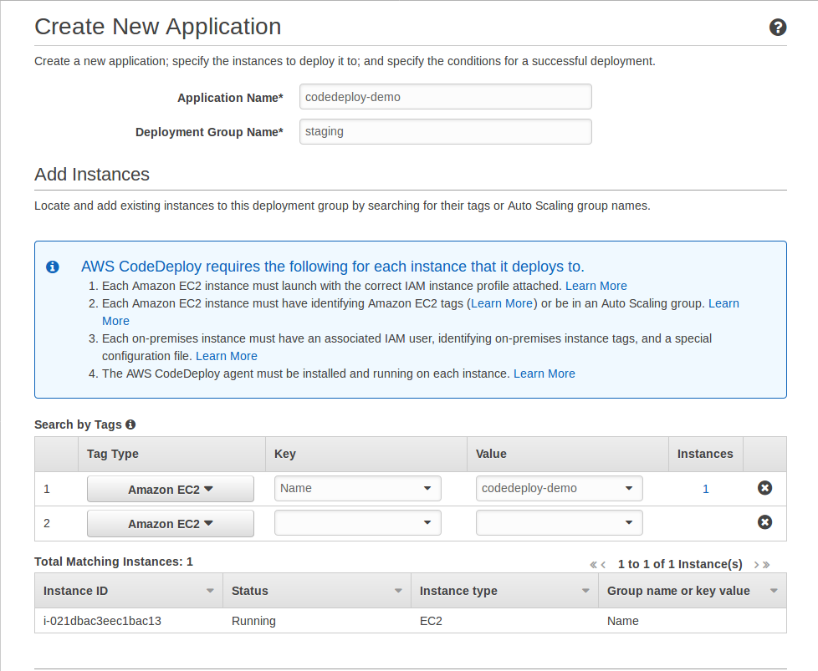
Now its time to create a deployment. On aws navigate to AWS CodeDeploy and create new application.
Fill in the name of application and instances uing the tag Name and value codedeploy-demo.
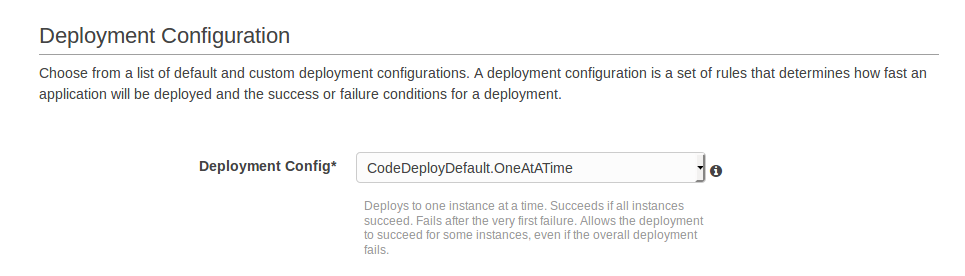
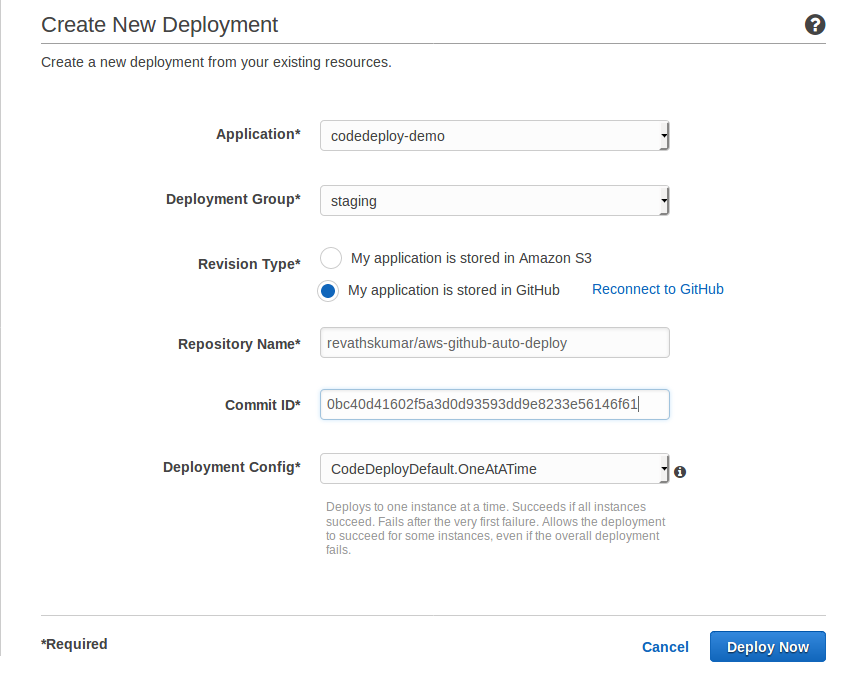
Now choose the deployment configuration, for the demo purpose I set it as CodeDeployDefault.AllAtOnce. More info on aws doc
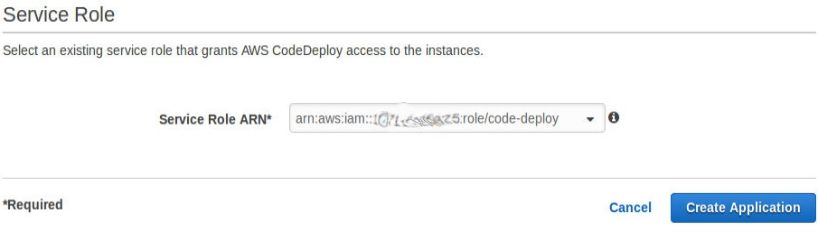
Now add the the IAM role code-deploy, which we create before as the service role
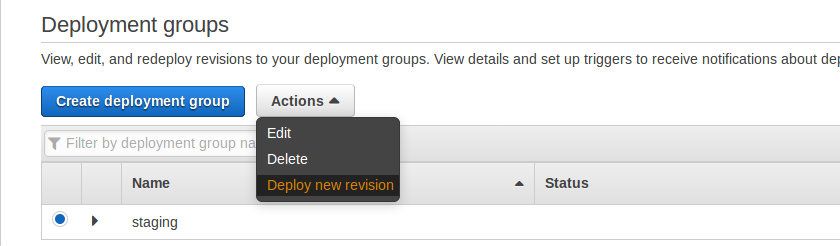
Once the application is created, we can deploy new revision.
For the first time, the codedeploy app will ask to connect to Github.
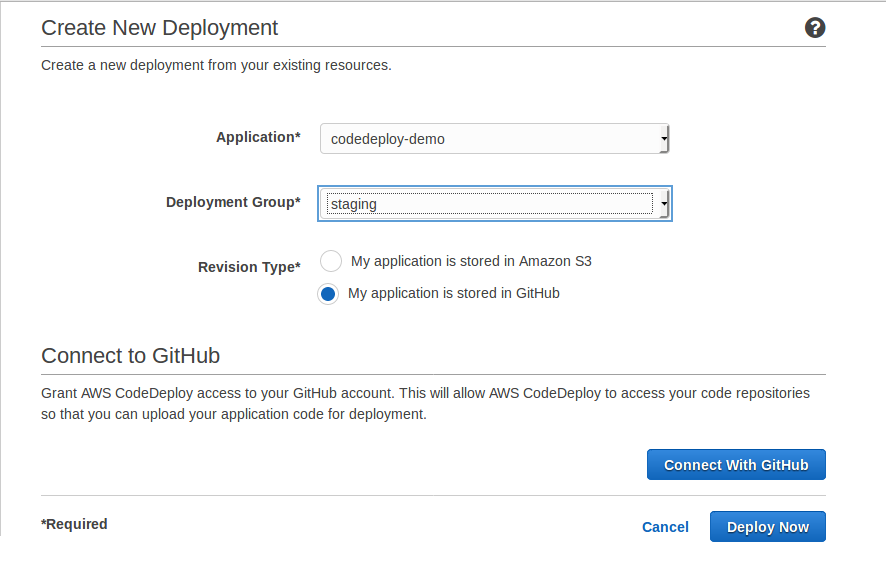
Once the github connection is setup, You can provide the repo name along with github username,
Eg: revathskumar/aws-github-auto-deploy, commit id.
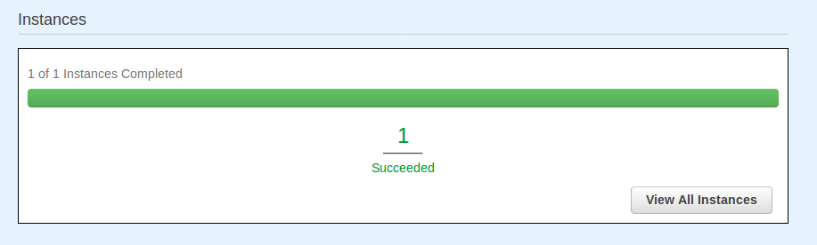
Now we can click on Deploy Now, which will deploy to all the instance configured for the codedeployment application.
Setup Autodeploy from Github
Now we are able to create the deployments, but manually creating the deployments eveytime is tedious. So lets automate the deployments using Github Integrations. For that first we will create a new IAM policy and user for github.
Create IAM policy
First we will create a IAM policy which give access to register and create a new deployment, also to create new revision for a deployment group.
Choose Create Your own policy from Create Policy and give some name codedeploy-github-access
and for policy document use the below template.
{
  "Version": "2012-10-17",
  "Statement": [
    {
      "Effect": "Allow",
      "Action": "codedeploy:GetDeploymentConfig",
      "Resource": "arn:aws:codedeploy:ACCOUNT_REGION:ACCOUNT_ID:deploymentconfig:*"
    },
    {
      "Effect": "Allow",
      "Action": "codedeploy:RegisterApplicationRevision",
      "Resource": "arn:aws:codedeploy:ACCOUNT_REGION:ACCOUNT_ID:application:APPLICATION_NAME"
    },
    {
      "Effect": "Allow",
      "Action": "codedeploy:GetApplicationRevision",
      "Resource": "arn:aws:codedeploy:ACCOUNT_REGION:ACCOUNT_ID:application:APPLICATION_NAME"
    },
    {
      "Effect": "Allow",
      "Action": "codedeploy:CreateDeployment",
      "Resource": "arn:aws:codedeploy:ACCOUNT_REGION:ACCOUNT_ID:deploymentgroup:APPLICATION_NAME/DEPLOYMENT_GROUP"
    }
  ]
}
Please make sure you replace the ACCOUNT_REGION, ACCOUNT_ID, APPLICATION_NAME and DEPLOYMENT_GROUP according to your application.
Create IAM user
Now lets create a new user.
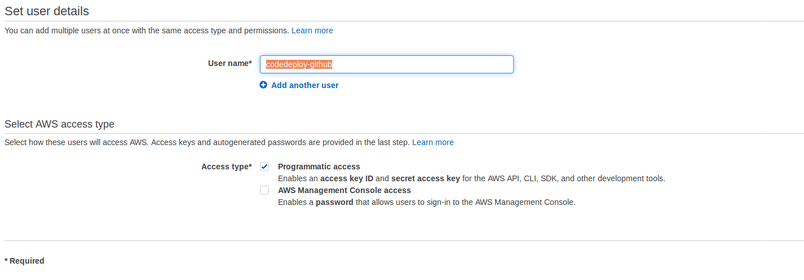
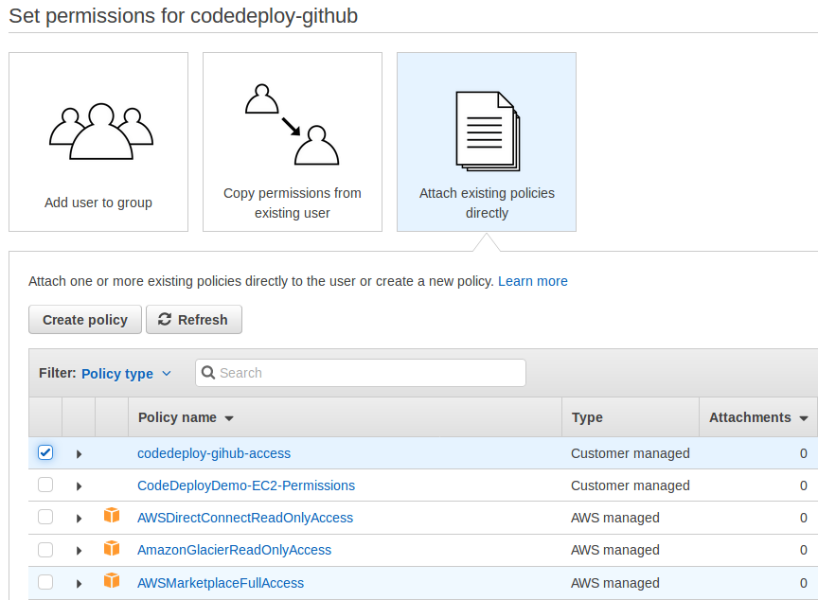
In the next screen attach the policy we created before
Once the user is created, it will show the Access ID and Secret Access Token
Copy those and keep it. Will come handy later.
Github Integration
To invoke AWS codedeploy from github, we need to configure two integrations on Github. Before we configure we need to generate new token with access to repo status and repo_deployments.
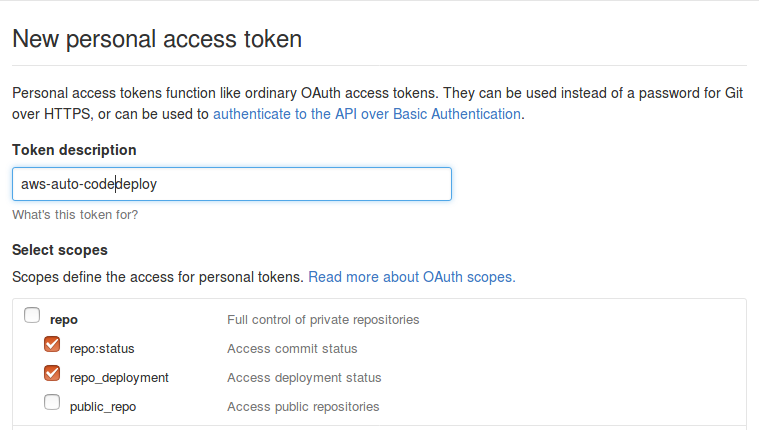
Once the token is generated, Copy the token and keep it. We need this token while enabling the integrations.
1) AWS CodeDeploy
We can add AWS CodeDeploy integration by navigating to Project Settings -> Integrations and services.
Then from the Add service dropdown choose AWS CodeDeploy
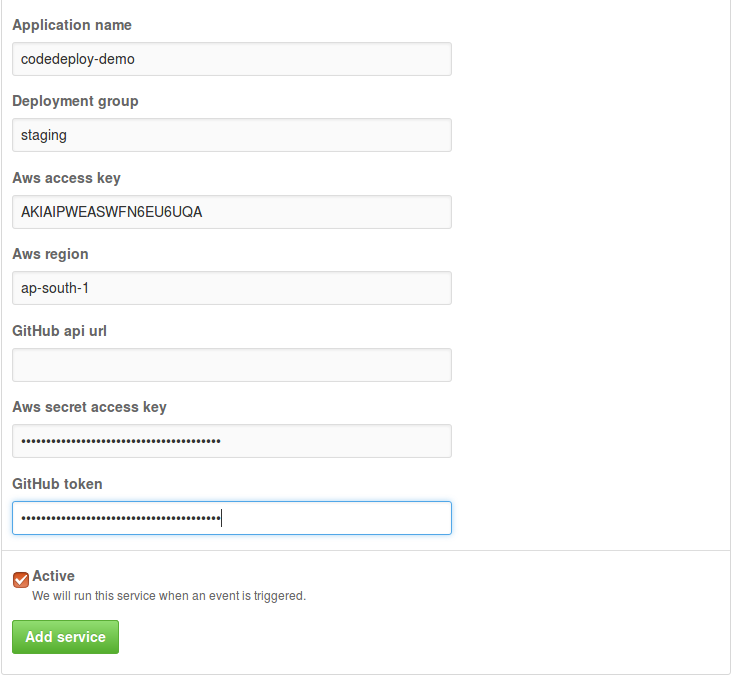
Fill the Application name, Deployment group, AWS region, Access Key, Secret Token and Gihub Token we generated. Once we save it, We can move to next integration.
2) GitHub Auto-Deployment
From the same Project Settings -> Integrations and services, this time we can choose
GitHub Auto-Deployment from the Add service dropdown.
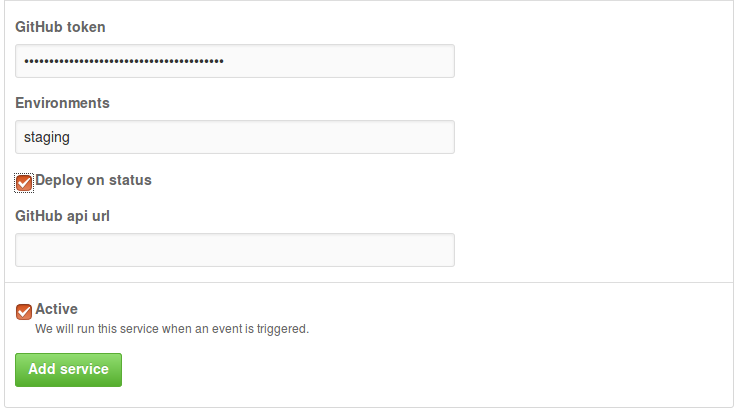
If you don’t have a CI server, You don’t need to check the Deploy on status checkbox.
Now when we edit file and commit on master branch or merge any Pull request a new deployment will be created on AWS CodeDeploy.
Thanks for reading!